A drip irrigation system is a fantastic way to water your garden efficiently. By delivering water directly to the base of your plants, it minimizes water waste, reduces evaporation, and helps your plants thrive by giving them consistent moisture. Best of all, you can create your own DIY drip irrigation system with simple materials, saving money and customizing it to fit your garden’s needs. Here’s a step-by-step guide to help you build a drip irrigation system for your garden.
What You’ll Need
Before you start, gather the following materials:
- Main supply tubing (typically 1/2 inch in diameter)
- Drip emitter tubing (1/4 inch tubing)
- Emitters or drip nozzles (pressure-compensating emitters work best for consistent flow)
- End caps or figure-eight clamps
- Tubing stakes (to secure the tubing)
- Barbed connectors (for connecting the main tubing to the emitter tubing)
- Hole punch tool (for creating holes in the main supply tubing)
- Timer (optional) (for automatic watering)
- Pressure regulator (to control water pressure in the system)
- Filter (optional) (to prevent clogging if your water contains debris)
Step 1: Plan Your Drip Irrigation Layout
The first step in creating a drip irrigation system is planning the layout for your garden. Take note of the types of plants you’re watering, their location, and how much water they need.
- Measure your garden: Use a tape measure to get the dimensions of your garden bed or container garden. Sketch a rough layout of your garden, noting where each plant is located.
- Determine water needs: Group plants with similar water requirements together. This will help you design an efficient system that delivers the right amount of water to each type of plant.
- Decide on the water source location: Identify where you’ll connect your drip system to your water source, such as a garden faucet or a rain barrel.
Step 2: Install the Main Supply Line
The main supply tubing will carry water from your water source to different sections of your garden. This is the backbone of your drip irrigation system.
- Lay out the tubing: Run the 1/2-inch supply tubing from your water source to the areas of your garden that need watering. Lay the tubing along the rows of plants, making sure it reaches the areas where you’ll install drip emitters.
- Secure the tubing: Use tubing stakes to secure the main supply line to the ground, keeping it in place as you work. This will help prevent the tubing from moving out of position.
- Cut and cap the tubing: Once the supply tubing has been laid out and cut to the appropriate length, cap the end of the tubing with an end cap or figure-eight clamp to prevent water from flowing out of the system.
Step 3: Attach the Drip Emitters
Drip emitters control the flow of water to your plants, ensuring they get the right amount of moisture. You’ll connect these emitters to your main supply tubing.
- Punch holes for emitters: Use a hole punch tool to create holes in the main supply tubing where you want to install the drip emitters. Space the emitters according to your plant spacing and water needs. For example, you may need more emitters for water-loving plants and fewer for drought-tolerant plants.
- Install barbed connectors: Insert a barbed connector into each hole you’ve punched in the main tubing. These connectors will allow you to attach smaller emitter tubing.
- Attach emitter tubing: Cut sections of 1/4-inch emitter tubing and connect one end to the barbed connector. Run the emitter tubing to the base of each plant.
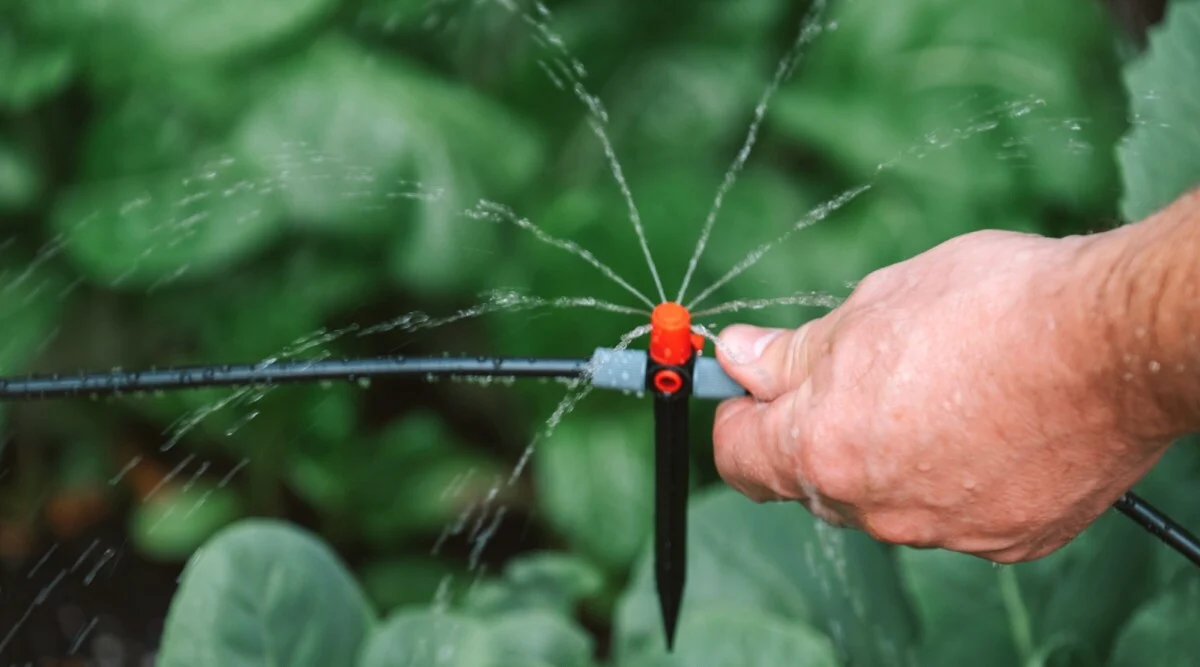
- Attach the drip emitters: At the end of the emitter tubing, attach a drip emitter or nozzle. Pressure-compensating emitters are ideal because they ensure a consistent flow of water, even on sloped terrain or with varying water pressure.
- Secure the tubing: Use tubing stakes to hold the emitter tubing in place so that water is delivered directly to the plant’s root zone.
Step 4: Connect the System to Your Water Source
Now that your tubing and emitters are in place, it’s time to connect your system to a water source.
- Install a pressure regulator: To prevent the water pressure from being too strong and damaging your system, attach a pressure regulator to your water source. This ensures that the water flows through the system at a steady, controlled pressure.
- Attach a filter (optional): If your water source contains sediment or debris, it’s a good idea to install a filter to prevent clogging in your drip emitters.
- Connect the tubing to the water source: Attach the main supply tubing to the water source (faucet or spigot). You can use a hose connector or a faucet adapter for this purpose.
Step 5: Test the System
Before you bury or secure everything, it’s important to test your drip irrigation system to ensure everything is working as it should.
- Turn on the water: Slowly turn on the water to your system and observe how the water flows through the tubing and emitters. Check for leaks, blockages, or areas where water flow is weak.
- Adjust as needed: If any emitters are clogged or not delivering enough water, adjust or replace them as needed. Check to ensure that the emitters are delivering water directly to the root zones of your plants.
Step 6: Set Up a Timer (Optional)
For added convenience, you can install an automatic timer to control your drip irrigation system. This will allow you to set specific watering schedules, so you don’t have to manually turn the system on and off.
- Install a timer: Attach the timer to your water source before the pressure regulator. Program the timer to water your plants according to their needs—early morning is generally the best time to water to reduce evaporation.
Step 7: Cover the Tubing (Optional)
Once you’ve tested your system and everything is working correctly, you can cover the main supply tubing with mulch or soil to keep it out of sight and protect it from damage.
- Lay mulch: Spread a layer of mulch over the tubing, making sure to leave the emitters exposed so they can continue to deliver water to your plants.
- Protect from damage: Keep an eye on your tubing when digging or working in the garden to avoid accidentally cutting or damaging the lines.
Tips for Maintaining Your Drip Irrigation System
- Regularly check for clogs: Over time, debris or mineral buildup can clog your emitters. Clean or replace clogged emitters as needed to ensure a steady flow of water.
- Inspect tubing for leaks: Periodically check the tubing for cracks or leaks, especially if you experience extreme temperature changes in your area.
- Flush the system: At the end of each season or before a major gardening project, flush the system to remove any sediment or debris that may have built up in the lines.
Final Thoughts: Save Water and Keep Your Plants Happy
A DIY drip irrigation system is an efficient and affordable way to keep your garden well-watered while saving time and water. By delivering moisture directly to the roots of your plants, you can help them thrive without the risk of overwatering or wasting water. With a few basic materials and a little time, you can build a system that works perfectly for your garden, giving you more time to enjoy the fruits (and vegetables) of your labor. Happy gardening!