Did you know that cleaning your refrigerator coils can significantly improve its efficiency and even extend its lifespan? Those hidden coils work hard to keep your fridge cool, but over time, dust and debris can accumulate, making the refrigerator work harder than necessary. This extra strain can increase your energy bills and reduce the appliance’s cooling power. The good news? Cleaning your refrigerator coils is easier than you might think! Let’s break it down step by step so you can give your fridge a little TLC and save some energy while you’re at it.
Why Cleaning Refrigerator Coils Matters
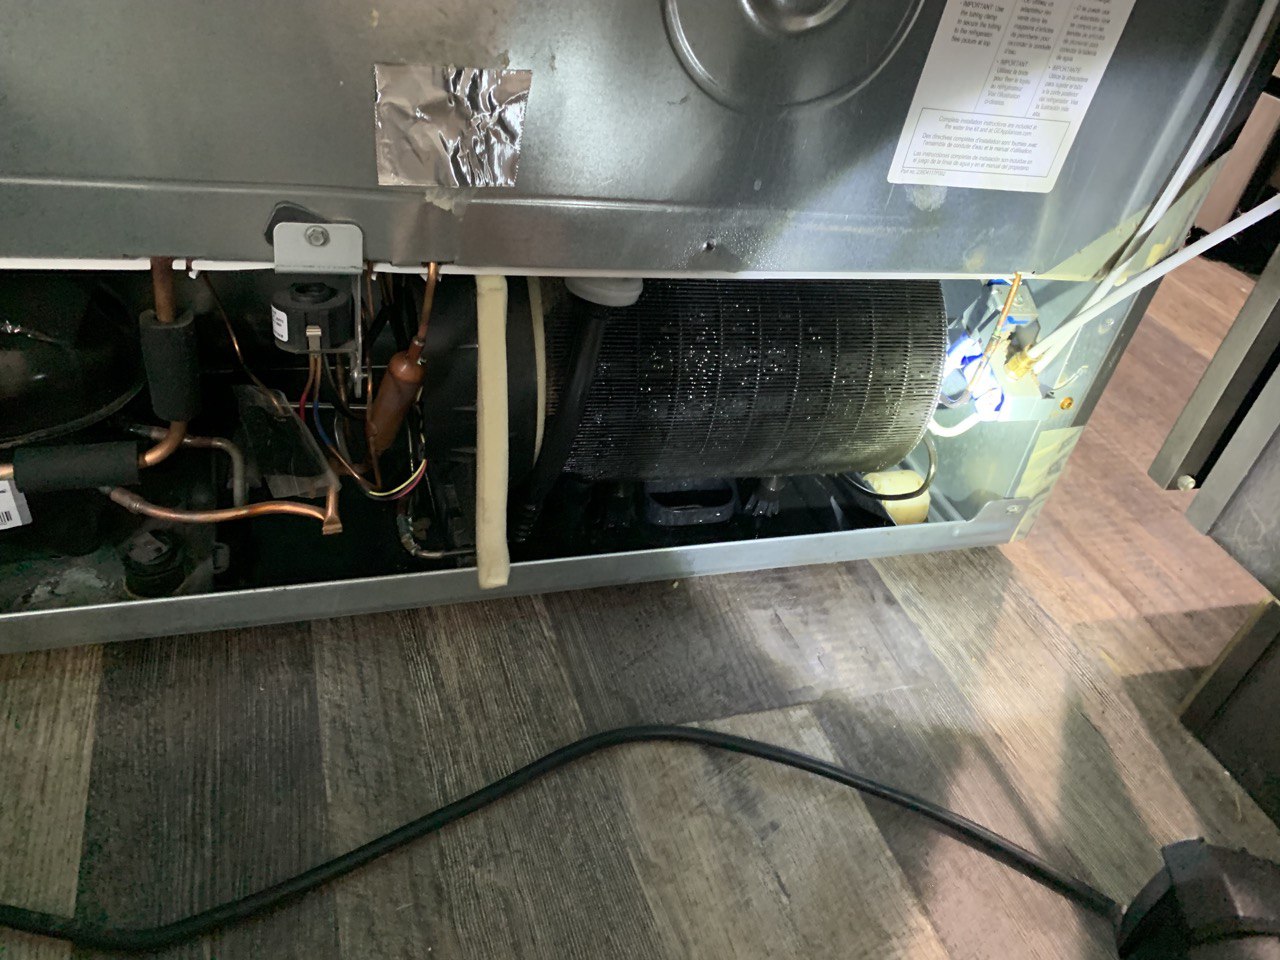
Refrigerator coils are responsible for releasing heat as the refrigerant cools your appliance. When dust, dirt, and pet hair build up on the coils, they can’t efficiently dissipate heat. This forces the fridge to work overtime to keep everything cool, leading to higher energy consumption and potential wear on its components.
Cleaning the coils regularly (every six months or so) can improve your refrigerator’s efficiency by up to 30%. Plus, a cleaner appliance means less strain on the compressor, which can help extend the life of your fridge. Let’s get started on how to clean those coils.
Gather Your Tools
Before you start, you’ll need a few basic tools to get the job done:
- Vacuum cleaner with a brush attachment
- Coil cleaning brush (optional but handy)
- Soft cloth or microfiber towel
- Screwdriver (if necessary to access the coils)
Locate the Coils
Refrigerator coils are either located on the back of the fridge or underneath it, depending on the model. Here’s how to find them:
- Back of the fridge: If your coils are on the back, you’ll see them when you move the fridge away from the wall. This is a common setup for older models.
- Underneath the fridge: For newer models, the coils are typically located behind a vented panel at the bottom front of the fridge. You may need a screwdriver to remove the panel.
Unplug the Refrigerator
Safety first! Before you begin cleaning, unplug your refrigerator to avoid any electrical hazards. Don’t worry—your food will stay cool for the short time it takes to clean the coils. This step is especially important when cleaning around any electrical components or using tools like a vacuum.
Vacuum the Coils
Now that you’ve found the coils and unplugged the fridge, it’s time to clean them. Using your vacuum cleaner’s brush attachment, gently vacuum away the dust, dirt, and debris from the coils. Be thorough, but careful not to damage any components.
If your coils are located underneath the fridge, use the vacuum to clean around the vented panel as well. This area can collect a surprising amount of dust!
Use a Coil Cleaning Brush (Optional)
For an even deeper clean, consider using a coil cleaning brush. This long, flexible brush is designed to reach into tight spaces and remove any stubborn dust or dirt trapped between the coils. Simply insert the brush into the coils, gently move it back and forth, and pull out any debris. You can find these brushes at most hardware stores or online.
After brushing the coils, use your vacuum one more time to clean up any dust that’s been dislodged.
Wipe Down the Area
Once the coils are clean, grab a soft cloth or microfiber towel and wipe down the surrounding area. Pay attention to the floor beneath and behind the fridge, as dust tends to accumulate there as well. A quick wipe will leave the entire space looking spotless and free from allergens.
Plug the Refrigerator Back In
With the coils clean and dust-free, you’re ready to plug your refrigerator back in. Push it back into place, ensuring there’s enough space for proper airflow around the coils. For fridges with back coils, leaving a few inches between the wall and the fridge can help with ventilation and cooling efficiency.
Final Thoughts: Keep Your Fridge Running Smoothly
Cleaning your refrigerator coils is a simple yet effective way to improve its efficiency, lower your energy bills, and extend the life of your appliance. By taking 10-15 minutes every six months to clear away dust and debris, you’ll help your fridge run more efficiently and prevent potential breakdowns.
Now that you know how easy it is, why not make it a regular part of your home maintenance routine? Your refrigerator—and your energy bill—will thank you!